Pages

Saturday, April 30, 2011

On the Back Burner...

As I said yesterday, I still need to order backing for the Bento Box quilt... so last night I sat in front of my bucket list and then my fabric stash for a few solid hours pondering what to start. Ask anyone who knows me well, it takes me a REALLY long time to get started on something. I don't know why. It is obnoxious. I am pretty sure that I read quilt books for a year or 2 before I actually cut into my first piece of fabric. I think it may be a disease, or at least some type of syndrome. 

Anyway, a few weeks ago I mentioned that I wanted to get a jump on kitchen curtains, oven mitts, and a stand mixer cover as well as pillows for the living room. Well, since then, we decided that it is time for us TO BUY A HOUSE. Yesssss! That made me think that starting home decor projects right now, when we don't know what our house will look like in a few months, would be stupid. So, I am going to put all home decor related projects on hold for a while. 

With that said, I need a new project to work on. I have so many fabrics in my stash, but I am finding myself uninspired. I am still so nervous about cutting into them. Stupid, I know. But, in my defense, designers are coming out with fabric too quickly! I still haven't even cut into my Anna Maria Horner Garden Party or some Good Folks, or Innocent Crush lines yet, and now she's coming out with a new line and you can't even buy Garden Party or Good Folks anymore.  I have also found that a lot of the fabrics I love the most are all mainly larger scale prints. When I look through my quilt books, I don't really see any quilts made from larger scale prints. That is something I am struggling with as well. Maybe I should just look at all of the traditional quilts in my books and make them all on a bigger scale to accommodate the bigger more modern prints? 

Bah I don't know. Now the wheels are spinning though....

xoxo

Friday, April 29, 2011

Finished Bento Box Quilt Top

It took me forever to finish this quilt top. I don't know why, but I left off here, back in March. I picked it back up last week and have done what feels like an ounce of work on it each day since I started up again. It seemed that every time I got the iron hot and the sewing machine on, something else seemed to come up. 

Anyway. I finished it! Of course, not before I played with the layout a little more:


Got it all ready and sorted for quick piecing (only to mess it up later):


All sewed up and doing the final pressing:


All laid out:


Now if only I could decide on backing and binding....

xoxo

Monday, April 25, 2011

A Finished Folksy Flannels Quilt!

I finished this fantastic little crib quilt which I started and blogged about here

I ended up trying a new basting method, spray basting. I previously only used the safety pin basting method and it was always kind of a pain. I read this tutorial from Ashley @ Film in the Fridge and was easily convinced to try spray basting out.  


To be honest, it was SOOO easy. I really thought the process was rather effortless, and I followed her to tutorial to a T, but I did use a different spray (because I couldn't find the 505 in the actual store). I may never pin baste again.

(Getting ready to quilt)


Quilting with the spray basting was a dream. I just did straight-line quilting on either side of the seams up and down the quilt. I wanted the quilt to keep its soft flannel feel with a nice flexible drape.


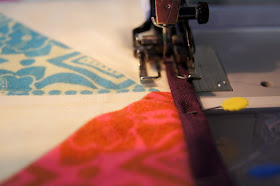
It took me almost 2 days to decide on the binding. I really should plan out all elements of a quilt before I get going, but I get too excited and jump right in. I didn't want to cut into anymore of the Folksy Flannels and I didn't like the feel of quilting cotton next to the flannel at all, but I did find a great deep purple colored cotton-linen blend (I think) at the bottom of my stash, so I went with it. The quilt is pretty girly (as intended) but I didn't want it to be TOO girly by adding pink as binding, so I think that the purple is perfect. I machine stitch my binding and it is an amazing time saver as well.


And finito! A finished Folksy Flannels quilt!


Quilt Stats:
- Fabric is 1/2 a fat quarter pack of Anna Maria Horner's Folksy Flannels (the girl colors, then blue)
- Batting is Warm and White 100% cotton
- Backing is some more from Anna Maria Horner's Folksy Flannels
- Binding is a plum cotton-linen blend
- Finished size is 50 in x 40 in crib quilt


I looooveee it. The project was stalled back in February when I couldn't decide on backing fabric (surprise surprise, I can never decide on backing).  All in all, I would definitely spray baste again and I would HIGHLY recommend using any of Anna Maria Horner's fabrics, she is amazing and I love them. 

See my finished projects in my flickr account. 

I have also marked another project off my bucket list!  Yess!

xoxoxox

Sunday, April 24, 2011

An Easter Tradition

It is our family tradition to have stuffed artichokes for Easter. We are Italian, but I really have no clue if this is a real tradition from Italy, or one of those Italian-American things we made up along the way (like anything a la vodka). I actually really don't care, I will make them every Easter the Earth runs out of artichokes or I die (this is my pledge). 

As you likely know, every Italian family on Earth makes their own version of each dish, so this is how my family makes stuffed artichokes. 

Step 1: Get the most gorgeous artichokes you can find. I found these at our Hannaford for $1.19ea (that's a great price for chokes this big)


Step 2: Cut about 1 - 1 1/2 inches off the top of the artichoke using a sharp knife and then use kitchen shears to trip the tops off each of the remaining leaves. Be sure to rub all of the cut sections with lemon so that they don't brown to quickly (I forgot to do a few in the back of the photo).


Step 3: Neither my mom or my grandma do this (but they have never had pressure cookers). I pre-cook all of the artichokes to get them to open up so that you can stuff the leaves more easily. I follow the pressure cooker instructions, which has me cook them for 10 minutes. 

 (Going into the pressure cooker)
 (Coming out of the pressure cooker)


Step 4:  Rub each leaf with extra virgin olive oil and while you do this, be sure to pull the leaves apart and really separate them so that they can be stuffed more easily. 


Step 5: Make your stuffing! This is kind of a "wing it" situation. I can't tell you how much to make in total, it really depends on how many chokes you have and how gargantuan they are. For example, I had to make three batches of stuffing while making these artichokes, they were SO HUGE! I am lucky we have so much cheese in the house or else I would have been running out to the store for sure.

It is comprised of:
1) equal parts grated Italian cheese blend (I used asiago, parmigiano reggiano, and pecorino romano) 
2) and Italian blend bread crumbs (I use Cora brand)
3) 1/4 c or more of dried parsley 
4) 1/4 garlic powder
5) 1 tbsp freshly group black pepper
6) NO SALT (there is more than enough in the cheese) 

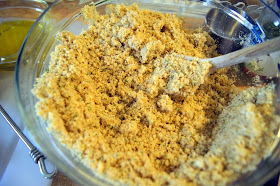
Mix all of those ingredients together:

And then add copious amounts of extra virgin olive oil so that the stuffing resembles more of a coarse meal and sticks together a bit. At this point I usually taste the stuffing to see if it is sufficiently garlicky. It usually is. I doctor it up until it tastes so good that I start eating it by the spoonful:


Step 6: Stuff that baby! The size of the artichoke leaves determines what size spoon you will use. For these chokes, I used a small spoon (about the size of a iced teaspoon (no, not a teaspoon) and then a teaspoon. It is much easier to use a small spoon and just add two spoonfuls than it is to use a spoon too big. To fill the chokes you take a spoonful of stuffing and literally stuff each and every leave of this baby until you cannot pull it apart anymore.

 (This was the first one of the batch that I stuffed, and I was a little shy with the stuffing; I was trying to ration)


Step 7: Preheat your oven to 350. Take the stuffed chokes and put them in a oven safe container with about 1 1/2 inches of water in the pan (enough water to just touch the top of the first set of stuffed leaves). Drizzle olive oil over the top of the chokes. Bring the chokes and water to a boil, cover with a lid (or foil), and bake in the oven for 2 hours or until the leaves are tender.

You can tell that the leaves are done when an OUTER leaf pulls off easily (the outside leaves are the toughest) and when you scrape the stuffing off the leaf, the meat of the leaf comes off without a problem. The stuffing should also be a nice golden brown.

Step 8: MANGIA! This is not the type of food to eat daintily. Sit down with a stuffed artichoke and a big glass of your favorite red wine, and dig right in. We usually serve these as appetizers and they are meant to be shared.

My mom and I cooked up 6 of these babies to bring to my in-laws for Easter, and only 4 actually made it out the door only 4 made it into their house, we picked at them along the way. I may smell like a hot garlicky mess for a week, but nothing else matters when a stuffed artichoke is put in front of your face. 

I hope you enjoy the recipe, it has given us much happiness at our Easter table (if there are still some left by the time dinner rolls around).

Happy Easter!

xoxo


Saturday, April 23, 2011

Glamour Shots (for Easter eggs?)

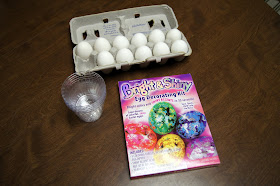
I hope I am not the only one out there, but I have absolutely no childhood memory of dyeing Easter eggs. When my neighbor got wind of this sad fact, I found her at my door with eggs and a cool dye kit. The dye kit was like nothing I had ever seen before, first you dye the egg, then you rub on colored foils.


 (Purple, "red", yellow, green and blue dyes)

 (Straight blue, blue-green, purple, straight green, yellow, and "red")


So, after all of the eggs are dyed and dried for a few minutes, you put this gluey substance over the eggs and let that dry for a minute to get tacky. Then, you took a square sheet of gold, silver, pink, purple, blue, and green colored foils and rubbed them all over the egg and peeled them off.... and this was our end result:


I think that I worked on the yellow & gold one in the center, the purple & pink one to the right of the yellow & gold, and the green and silver egg in the top left-hand corner. I even got my husband to work on some eggs! He's not really a crafter, he's moreof a tinker-er. I should have gotten some photo evidence, but I didn't.

I am not going to lie to you, I kind of LOVED IT. I want to gold foil everything in my house. This might be another addiction. I also loved the egg dyeing. Unfortunately, I don't like hard-boiled eggs at all, so it would be a waste to dye a bunch and toss them. My neighbor took them home with her after I had my fun. AND IT WAS FUN!


Happy Easter everyone!

OH and that is another item off the bucket list! Yessss! Check out my finished projects on flickr

xoxoxox

Tuesday, April 19, 2011

Some Gnocchi

I have had a major hankering for gnocchi for a while now. I can't explain it. But, I mean, who can deny these tempting little pillowy bites:


Aren't they lovely?

I used a cook book we have called "America's Test Kitchen - Cooking for Two". We LOVE LOVE LOVE America's Test Kitchen. I guess we really like the idea of people doing all the hard work for us, and the recipes being almost fool-proof! The recipe I followed was for a ricotta and parsley based gnocchi with a brown butter and sage sauce. 


The dough:


The gnocchi:


And guess what? I totally forgot to take a picture of the final product. We were wayyyyy to busying munching on them to take pictures. Turns out that they look VERY similar to the last temptation photo that I showed above. They were amazing!! 


xoxo

Sunday, April 17, 2011

Now that it's over, it's on!

Now that tax season is OFFICIALLY OVER and I no longer feel like this: 


I can finally get back at crafting and make some headway on my bucket list! 

I haven't been able to work on too many projects lately, but I have been certainly been checking blogs for inspiration. Most notably, I LOVE all of the pillows that Angela over @ Fussy Cut has been making. They are really spectacular and I want to follow her pillow making tutorial to make a few of my own.

I also want to finish up the folksy flannels quilt I started back in February as well as the bento box quilt I started a little bit ago.

Our house is desperate for a new set of curtains for the small window in our kitchen. That shouldn't be too big of a project, but I haven't made curtains yet, so I'll keep you all posted. I might use some Anna Maria Horner voile, I am not sure yet.

To coordinate with the kitchen curtains, I want to me a cover for our stand mixer. I took the dimensions of the mixer a while back, but am still pondering the design for the cover. 

OH and... new oven mitts too. We received a great oven mitt for a Christmas present, and I want to replicate it and make one or two for our kitchen.


That's my list for the next few weeks. 

- Finish bento box quilt

- Finish folksy flannels quilt
- Sew some pillows for our couches
- Sew kitchen curtains
- Sew a stand mixer cover
- Sew oven mitts


Happy April 17th!
 

Sunday, April 10, 2011

A finished crocheted hexagon throw (and some osso buco) . . .

I finished it!!!!! Yesssssssssssssssss!! I really loved this project, it is a perfect summer throw for our sofa and I love how it turned out.

 I have blogged about this throw here,  here,  and here!

 
Project Stats:

Yarn: 2 of each color Cotton Ease 100% cotton yarn in white, off-white, mustard, poppy, celery, navy, & taupe
Finished hexagons: 126!!!!!!!
Finished size: 3 1/2 ft x 5 ft
Hours to make: 1,000,000 (est.)
Guess what? That's another item off the bucket list! You can find a link to all of my finished projects on flickr here.

Oh, also, today is my husband and my 6 month wedding anniversary! Husband has been on vacation for 10 days and got back around 8 o'clock tonight and I surprised him with Osso Buco (essentially, braised veal shanks) and it turned out amazinggggg!:


Only one more week until tax season is OVER and I will get some serious R&R. However, I did find time in my day to take a little nap with the new lovely throw:


 xoxoxoxo

Tuesday, April 5, 2011

Progress and yet another fail

I have been working DILIGENTLY at completing my hexagon throw. I finished almost all 98 pieces, sans a few because guess what? I started this project soooooo long ago that they no longer make the navy blue yarn (which is the center of every hexagon). Fail.

So I started with the layout:


I should have laid out a ruler so you all could see how tiny this "throw is". I realized that I just had to make some more hexagons to take this from a pillow cover to a throw. Considering that I ran entirely out of navy, I made solid hexagons using all the other colors. I think I ended up making 3 or 4 of each color and that really helped make the throw larger and I think that it also brightened it up a bit.


There is the official layout! I plan on measuring it when I am all finished, because right now it is probably quite a few inches bigger than the end result will be. I am so excited to finish up this project, it has been a long time coming and the end is in sight!

Looks like I have lots and lots of crocheting ahead of me... 

xoxo