Showing posts with label hexagon. Show all posts

Sunday, April 10, 2011

A finished crocheted hexagon throw (and some osso buco) . . .

I finished it!!!!! Yesssssssssssssssss!! I really loved this project, it is a perfect summer throw for our sofa and I love how it turned out.

 I have blogged about this throw here,  here,  and here!

 
Project Stats:

Yarn: 2 of each color Cotton Ease 100% cotton yarn in white, off-white, mustard, poppy, celery, navy, & taupe
Finished hexagons: 126!!!!!!!
Finished size: 3 1/2 ft x 5 ft
Hours to make: 1,000,000 (est.)
Guess what? That's another item off the bucket list! You can find a link to all of my finished projects on flickr here.

Oh, also, today is my husband and my 6 month wedding anniversary! Husband has been on vacation for 10 days and got back around 8 o'clock tonight and I surprised him with Osso Buco (essentially, braised veal shanks) and it turned out amazinggggg!:


Only one more week until tax season is OVER and I will get some serious R&R. However, I did find time in my day to take a little nap with the new lovely throw:


 xoxoxoxo

Tuesday, April 5, 2011

Progress and yet another fail

I have been working DILIGENTLY at completing my hexagon throw. I finished almost all 98 pieces, sans a few because guess what? I started this project soooooo long ago that they no longer make the navy blue yarn (which is the center of every hexagon). Fail.

So I started with the layout:


I should have laid out a ruler so you all could see how tiny this "throw is". I realized that I just had to make some more hexagons to take this from a pillow cover to a throw. Considering that I ran entirely out of navy, I made solid hexagons using all the other colors. I think I ended up making 3 or 4 of each color and that really helped make the throw larger and I think that it also brightened it up a bit.


There is the official layout! I plan on measuring it when I am all finished, because right now it is probably quite a few inches bigger than the end result will be. I am so excited to finish up this project, it has been a long time coming and the end is in sight!

Looks like I have lots and lots of crocheting ahead of me... 

xoxo 

Monday, March 28, 2011

Mini-fail

In my last post I mentioned working up some crocheted hexagons to finish a project I started a while back. Well, I made about 20 in the past week and guess what? I used the wrong hook. I don't know why, but for some reason I thought I made all my other hexagons using a 5, but really I used a 4, therefore the newest hexagons I made came out 1.5 times larger than all my others. I had to rip them all out. ALLLL OF THEM. It hurt my feelings. I didn't take pictures because when I realized that this happened, it was Sunday morning (my only day off) and I ripped out every single one and re-did them all. I had to.


I am not sure how big I plan on making this afghan. By the end of the week I should have 98 completed. I might just crochet them all together and see what it amounts to - a summer lap blanket maybe?


xoxoxo

Monday, March 21, 2011

In the meantime...

Last week I was forced to put away ALL OF MY QUILTING (which occupies all of our dining room) in order to make room for some guests that will be staying with us until the end of March. Remember the adorable little lady and her wonderful mommy that I visited in this post? Well, they are moving to Germany in a few weeks and are staying with us to get all their visiting in before they cross the pond. 

Since I knew that they were coming (months ago) I have been trying to think of what to craft while we have company. I couldn't get inspired to knit wintery things like mittens and scarves, because I am SO OVER winter. 

Given that, I pulled out this item from my bucked list. It is the "Finish crocheting hexagon granny square afghan". This project was entirely inspired by one of my favorite bloggers, Lucy @ Attic24. She is a wonderful blogger and she inspired me to learn how to crochet a few years ago when I saw this post.

I immediately went to the yarn store and grabbed lots of yarns in lots of colors and started going on this project. I know that I needed 7 colors (thought process: a hexagon has 6 sides, plus one for the center = 7. But I didn't want any of the 6 sides, to be the same color as each other or as the center, so I needed 7 colors total, if that makes any sense at all to you). I wanted this afghan to be a summer blanket, so I made it out of cotton yarn so that it was nice and light. I used 100% Cotton Cotton Ease yarn in these colors:

 (White, taupe, celery, off-white, coral, mustard, navy)

The accountant in me knew that I needed a plan of action to tackle all of these colors, so this is what I came up with to keep this project organized:

 (Yes, I do understand that it might not make any sense at all to you, but it basically tells me which order to use the yarns, for each grouping of 7 hexagon squares. It really does make sense, I promise!)

Did I mention that I started this project long before I got engaged, so that makes it almost, umm, 2 years ago? I kind of lost my steam with the project and planning a wedding was a perfect reason to take a break. This is what I had accomplished already:

(There are 5 groups of 7 hexagons each which = 35 hexagons done!)

(I also had this group done, however, they weren't organized at all. This required some patience, as I had to match up each hexagon to the excel spreadsheet above and organize them as I did the others)


Ok! So here are all my hexagons, all sorted and organized so that I know how many rows I have done and how many I have left.


I have 8 stacks of 7 hexagons = 56 hexagons total. If you look at the excel file, you may noticed that I have 7 groups or rows of hexagons lined up. I mapped out what the hexagons will look like for 7 groups of hexagons. See the pic below... from left to right... that is row/group 1, 2, 3, 4, 5, 6, 7. Notice that I have 2 stacks under row 1, that's because I plan on doing each row/group of hexagons two or 3 times to get a blanket big enough. So eventually I will have 2 or 3 of each row/group 1, 2, 3, 4, 5, 6, 7. Makes perfect sense right? Sure....

I hope to make good headway on this project while my girlfriend and her daughter are visiting. I might just stop at 2 stacks for each row/group, which means that I will need to have 14 x 7 = 98 hexagons total. I have not yet tried to put the hexagons together and considering I am new to crocheting (like, this is my first project) I have literally no idea what I am going to do. I would really love some advice from all you crocheters out there!


xoxo

Thursday, November 18, 2010

Mug Rug YAY and Mug Rug FAIL

To start, I have a problem. I am a afraid to cut into my favorite fabrics. Like, really afraid. I buy all these gorgeous fabrics that I just love, but I use hand-me-downs instead because I am afraid I will mess up and waste the good stuff. This is causing a chain reaction of problems. I don't use the new fabric, then I'm not super-happy with the result, then even if I like the sewing pattern, I don't want to make it again.

Does anyone else have a WICKED fabric-cutting phobia? Am I the only one out there? I guess I just have to start cutting the crap out of my good fabric and actually loving my end results.

Now that I've confessed my phobia... 


I made my first mug rug AND it happened to be the first time I made hexagons (this is the one I like):


(A close up of the quilting detail on the hex. In retrospect, I would have done a better job)


 (I like this quilting pattern on the hex)

 (Straight line quilting on the other parts of the mug rug)

(Back view of the quilt job)

(This is literally my favorite part. I love the how the quilt design showed up on the back. Whenever I do hexagons I want to do this.)


ANDDD... Here is my second mug rug ever AND my first double hourglass piecing:

(again with the fabric. I know it's Christmas time, but I have tons of other stuff that I am just afraid to use, so I, for whatever reason, thought plain red and green were appropriate)

 (I actually LOVED piecing the double hourglass. It has been my favorite block to piece and I am actually pretty proud of my corners lining up, I thought it would be a major fail but it wasn't)
(Oh right. This is where the FAIL comes in. Terrible Quilting. Now I hate the red and green. Why did I have to add the white? It looks sooo stark. I'm not even going to bind the thing, I hate it.)

Am I allowed to just abandon a project like that? I really just think it sucks. I AM going to make more mug rugs, and I LOVED making the double hourglass. So I am not failing anything on my list. I'm just throwing that hideous thing in the garbage. 

I am setting a sub-goal for myself. By the end of this next weekend, I vow to cut into my coveted Anna Maria Horner fabrics and make some double hourglass blocks. I will post results by Sunday. 

<<NOTE: I used the double hourglass tutorial provided by Cluck. Cluck. Sew. and it really was very very easy. Promise. >>

Thanks for listening! Please don't leave comments telling me that the mug rug was nice. It really was just terrible.

xoxo,

Lauren


Wednesday, November 17, 2010

Hexagon Goodness

Hiii,
 
It is no secret that hexagons are everywhere these days, but that doesn't make them any less awesome. Here are some of my favorite hexagon pictures from out there in blogland:


 (I know that this one came from www.redpepperquilts.com, one of my absolute favorite blogs)


I will consider this task practice for making the hexagon / honeycomb quilt on my Bucket List. I found various methods from a few different tutorials work best for me. To make the hexagons, I loosely followed a hexagon tutorial from Amy Gunson. I mainly used page 7 of her pdf for the correct sized cut-outs. See my process below:


1) First, I bought a hexagon template for rotary cutting my fabric. See template below:

(Found at Joann's for $16.99 (but only $10.20 with a 40% off coupon))

2) Then I decided which size hexagon I want to make. The template can allow for a finished 1 inch, 2 inch, 3 inch, 4 inch, and 5 inch hexagon. However, the tutorial from Amy provides a pattern for 2 inch hexagons, so I just went with that. See a closer look at the template below, hopefully you can actually read the numbers on the template.


3)  Then I picked out some fabric scraps to cut up and pressed them flat. Note that to make a 2 inch finished hexagon, you need fabric that is at least 2.5 inches square (to account for a 1/4 seam allowance on all sides of the hex). See the fabric scraps I picked out:


3) After you have your fabrics all picked out, cut your scraps into 2.5 inch strips like below and press:


 (2.5 inch strips are all pressed and ready to go)

4) Then, using the hexagon tool, cut out the hexagon in 2 steps, both show below:
  • STEP 1: Starting at the left side of the strip, line up the corner of the 2.5 inch hexagon template with the edge of the strip and, using a rotary cutter, cut along the right side of the hexagon template:
 

(a closer look)

 (an even closer look)

 (Cut along the right side of the template)

(finished step #1)
  •  STEP 2: <Please forgive the bad pictures> Flip around the template with the cutting edge towards the left end of the fabric strip. Make sure to align the already cut corner in step 1 with the 2.5 inch corner of the template. Then, once everything is in line, rotary cut the left edge of the hexagon.
 (aligning the fabric with the template)

(a finished cut hexagon)

(continue to work across the strip with step 1)

(and again with step 2)

5) YAY! Now you have the fabric for your hexagon:

(YAYAY! Repeat with all your cut strips and you should have a few hexagons)

6) Now, using the template from Amy @ Badskirt, print out a few copies of page 7 (it has all the paper hexagons that measure 2 inches). It is recommended to use card stock, but I can't print on card stock from my home printer, so I just used regular printing paper:


7) Cut out all of the paper hexagons:


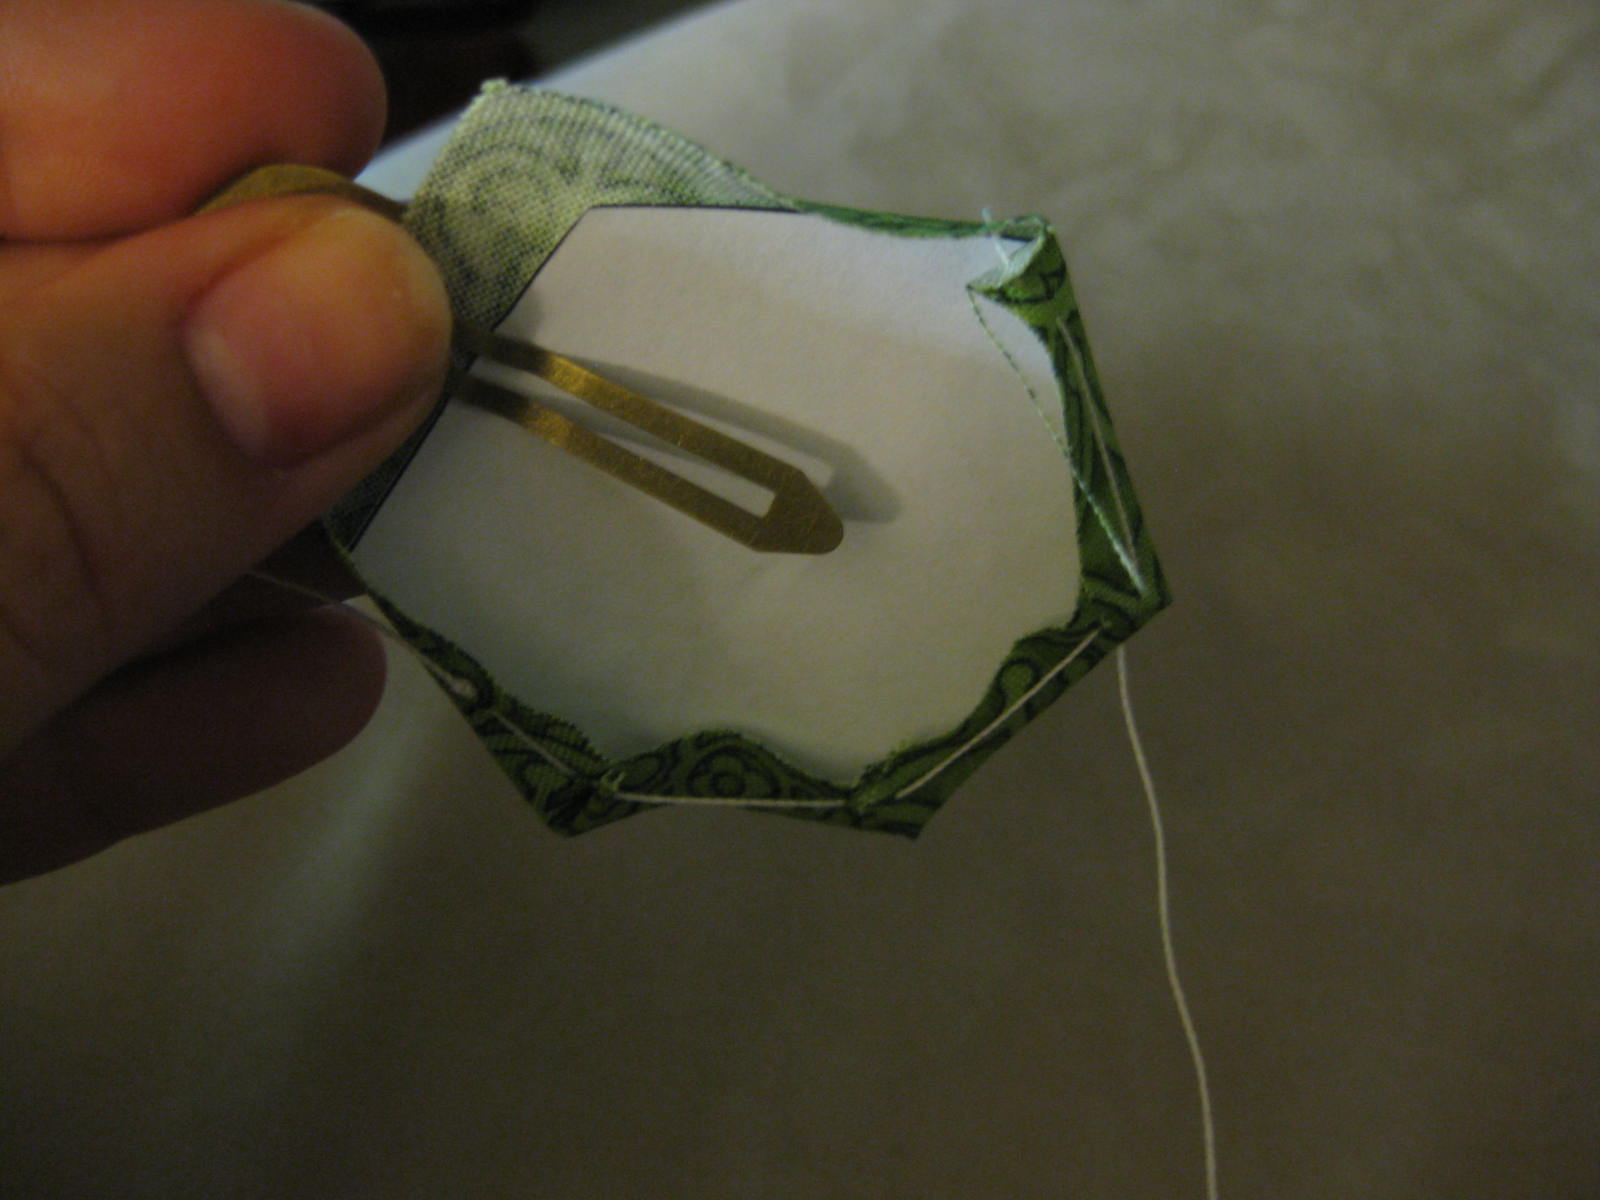
8) Start lining up the paper hexagon with your fabric hexagon. Now, you can see that the paper hexagons are about 1/4 inch smaller than your fabric. Match up your paper hexagons with your fabric hexagons by aligning the paper hexagon in the middle of the wrong side of the fabric. I affix a hair clip to hold the two together temporarily, it really helps with making a more accurate hex:


9) Now it's time for basting your hexagons. 
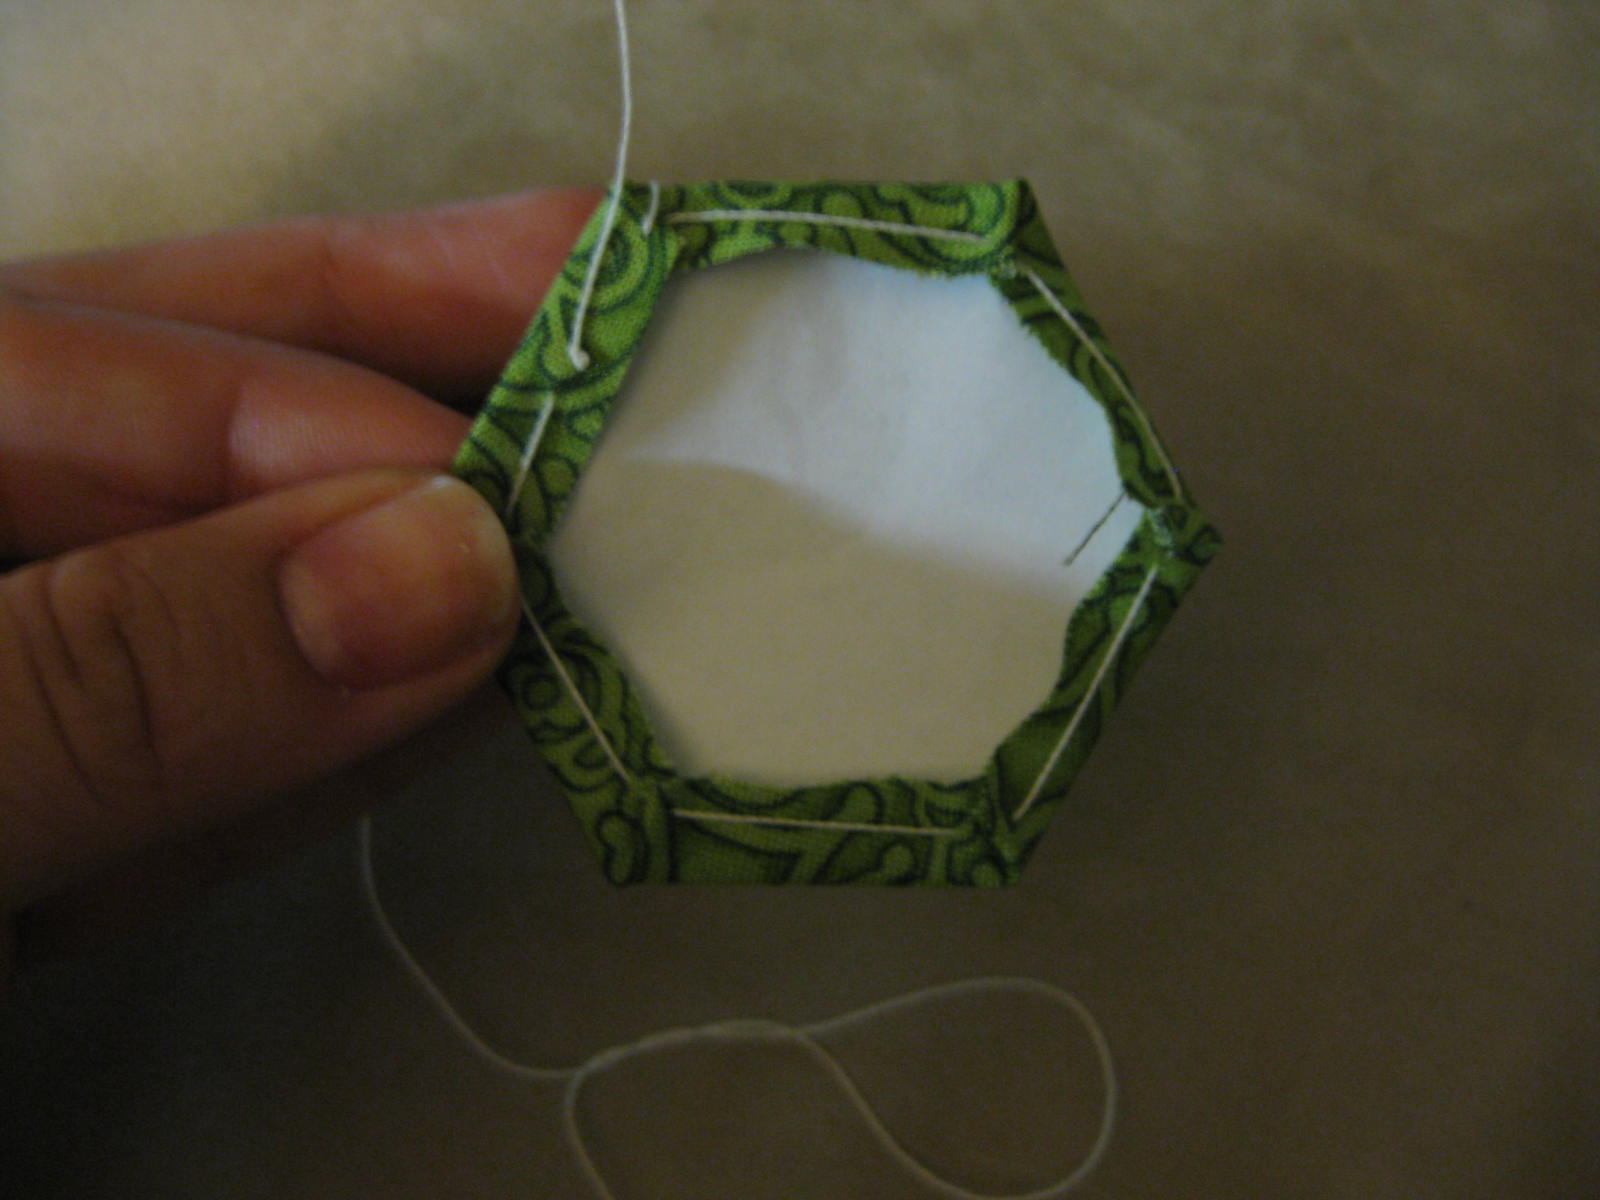
  • Using a needle and thread with a knot at the end (thread color doesn't matter at all), start on the edge directly left of the clip and fold the fabric edge over the paper (I find that it helps a little to press the folded edge with your fingers)
  • Insert your needle into and out of the FABRIC ONLY, not the paper template. You will NEVER insert your needle into the PAPER or the FRONT OF THE HEXAGON.
 
  • Move counter-clockwise around the hexagon, folding over the edges and basting the fabric at the corners. I find it easiest to baste at the corner fold nearest to the center, not the edge, it gives me the best corners. 


(Baste the fabric in EACH CORNER)
  • When you get to the last 2 corners, remove the clip and continue to baste:
(Removing the clip)

 (Clip is gone)

 (Continue to fold last 2 corners)

(Baste last corner)


 (Cut the thread)

 (Tie a knot to secure the basting)

 (A finished hexagon!)

 (This one turned out better than the green one, so I wanted to show you that it gets better with practice)

(A bunch of finished hexagons)

10) After your hexagon is basted, take it to the ironing board and start pressing the heck out of those seams. I wouldn't recommend using steam because it might distort your paper hexagon (if you intend on using it again). I literally just set the iron on the hex for a while and prayed that it didn't burn. 

 (Firmly pressed hexagons)

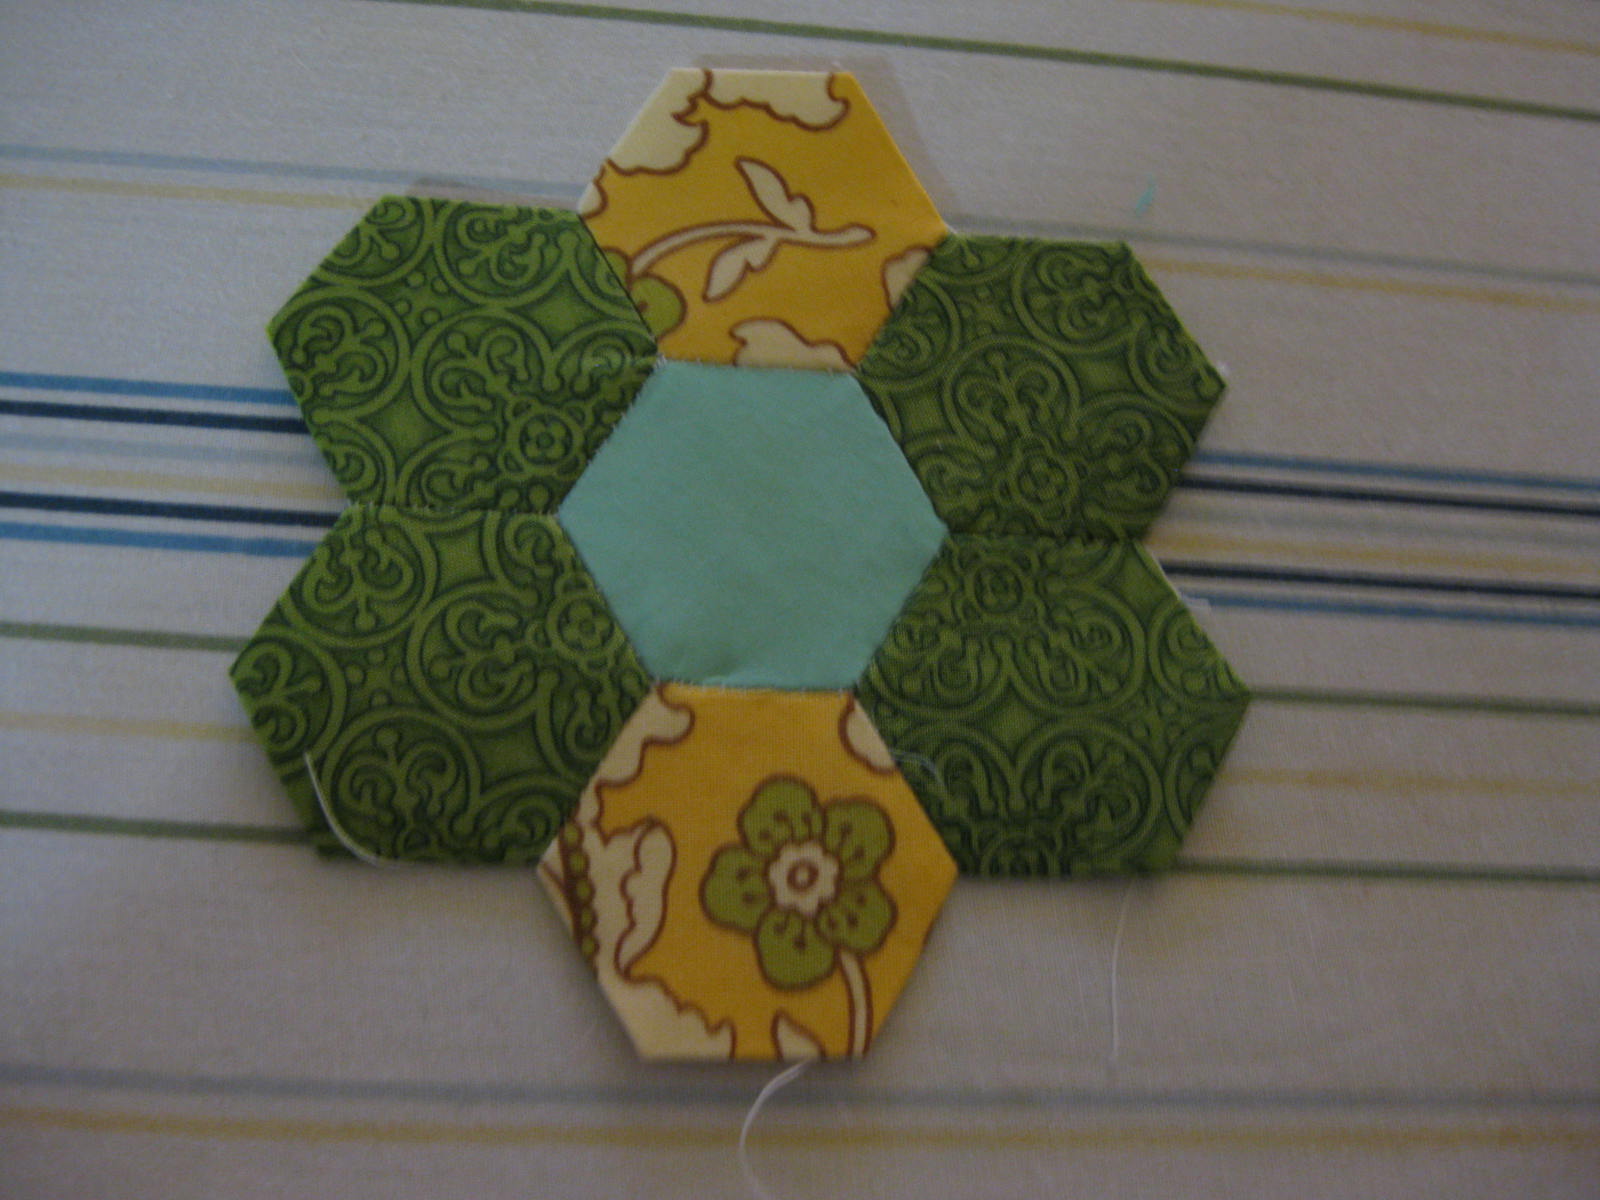
11) After you've got a bunch of little hexagons pressed beyond belief, it is time to decide how you will design whatever you are making. Below are common hexagon pattern arrangements:


(flower arrangement consists of 1 center hexagon with six hexes surrounding the center)

 (Diamond arrangement with hexagons consists of 1 center hexagon with 8 hexagons surrounding it and built up further from there)

(A completely random but wicked fun arrangement)

12) Now that you've picked out your arrangement (I will be doing the hexagon flower), play around with your fabric layout:


 (This is the arrangement I chose to go with)

13) Once your layout is determined, you can start sewing them together (Sew with RIGHT SIDES facing one another). There are two stitches that can be used. You can use the whip stitch or the ladder stitch. See page 3 of Amy's hexagon tutorial detailed illustrations of the 2 stitches. She does a very good job of showing you how to make the stitches, so I am not going to reiterate, I just want to show you the end result of each stitch. See my pictures below of the two stitches. I don't love either stitch really, here is my take on them:
  • Whip Stitch: A very quick stitch. I find that with the whip stitch is too loose and the thread shows on the front of the hexagon. However, this allows the hexagon to lay perfectly flat after being stitch together with other hexagons. So it bothers me that the thread shows. 


(If you look closely at the seems, you can see that the thread shows and that really bothers me)
  • Ladder Stitch: This stitch takes a little longer. I also find that the ladder stitch is a tighter stitch but leaves a weird effect on the front of the hexagon that doesn't allow it to lay perfectly flat. It bothers me that it doesn't lay as flat at the whip stitch. 

(A close up)
 
(Notice that there are no little threads showing, I like that, but you can see that there almost look like indents because of the stitching)

(No little threads showing)

 14) Now that the hexagon is all stitched up, take it over the to ironing board and press the life out of it:


 (Hexagon flower all pressed)

15) I haven't made hexagon arrangements larger than one of the flowers, but after you are done with your entire arrangement, that is when you take out the papers. To be honest, I am not sure what the rule is on taking out the basting threads. They are invisible from the front, so I guess if you wanted to leave them in for more stability, I can't see that being a problem. Whichever you choose to do, make sure to take out the PAPER FIRST so your basting threads help to not distort the hex. I am going to leave my basting threads on this time. I guess my method is pushing the paper out from the front of the flower. 

 (No more papers!)

16) I would definitely go give the hex another press after you remove all of the papers.


17) Then, I would trim up all those loose ends. I think it's safe to say that you can trim them pretty close to the knot you made

(No more loose ends!)

18) Then I would press them again, it can't hurt, right? AND DONE!

 (YESSSSSSSSSSSSS!)

OK! All that work for some hexagons? Yup. Let me know if you have any questions at all or if I can add anything to the semi-tutorial to make it any more helpful if you are using it as a guide.


Happy Crafting. So much for the typical Wordless Wednesday post that most bloggers do. Maybe next week.